MARKETINGZOO
  • HOME
  • Take a Peek
  • SIGN UP NOW
  • MEMBERS CLUBHOUSE VISITORS
  • Help
  • OUTPOST SITE SIGNUP
  • FAQ
  • MARKETING STRATEGIES
    • Marketing Plan Recommendations
    • INSTRUCTIONS
    • SEO & WEBSITES
    • Duplicate Content Boogey Man
    • adding intros and outros
    • Youtube optimization
    • stress reduction secret
    • Videos for SEO
    • POPULAR KEYWORDS
    • cleaning and restoration marketing content and resources
  • How to Update Your Payment Information
  • CONTACT FORM
  • Vote for the Clean Party
  • BLOG
  • FREE TO INDUSTRY
  • Success
  • Canceled
  • Lesa StPierre
  • YOUTUBE
  • xmas video
  • videoblog
  • NEW SIGNUP PAGE
  • BASIC MEMBERSHIP
  • SINGLE PLUS MEMBERSHIP
  • DOUBLE PLUS MEMBERSHIP
  • TRIPLE PLUS MEMBERSHIP
  • GET STARTED
  • signup now
  • SEOptimized Videos
  • Paid YouTube Ads
  • Marketing Tips
    • Marketing Tips MAY 2022
    • Marketing Tips June 2022
    • Marketing Plan
    • Marketing Tip November 2022
    • Marketing Tip Add Subtitles to Videos
Sentry Page Protection
Please Wait...

2020 Articles

How to Customize an Article
It isn't always necessary to customize an article. Search engines will ignore so-called duplicate content when in different geographic markets. If you wish to customize an article, see how easy it can be accomplished on the Instructions page.

Picture
BACK TO CLEANING ARTICLE DIRECTORY

2020 CLEANING ARTICLES
Scroll Down to Month with the Article You're Seeking

Art- MZ article – Cleaning- December 2020

Wonderful Wood Floors

Cleaning and maintaining hard surfaces is a task that can really enhance the appearance and value of your home.

While most hard floors respond well to routine cleaning and maintenance, there are still challenges inherent with natural wood flooring materials that require your special attention.

The first challenge is a gritty one. Speaking of soil, of course. Any type of soil on a surface acts as a natural “sandpaper” and slowly but surely damages the surface as it is walked on. This can happen to carpet and hard floors, but it’s the appearance of hard floors that will show the damage. Imagine putting some sand on plexiglass and walking on it for a long period of time. The surface is going to get scratched and you will see it. The same is true of hard floors. Carpet may hide the issue to some degree — hard floors do not.

The key to protecting your wonderful wood floors is daily maintenance. Don’t let a day go by without sweeping or, even better, using a dust mop on the floor. It doesn’t take long to do this, just a few minutes, but keeping that gritty soil off the floor will protect it. Choose a quality dust mop wide enough to make quick work of the chore, but not too wide that you can’t get into tight areas or corners.

There are special vacuum cleaners for hard surfaces that work great as well.

At least once a week, completely clean your wood floors. This means after removing the dry, gritty soil, deep clean the floor with warm detergent solution. Choose a detergent for your type of floor. A quick online search should provide you with the best product type. Keep moisture to a minimum but enough to dampen the floor as you clean it, removing oils and contaminants as you work. Rinse out and repeat several times until you are confident your wood floors are “squeaky clean.”

When you come across specks or soils that stick to the floor, scrape them off with your fingernail or a sharp blade, but be careful not to scratch the floor.

Of course, the best way to care for your wood floors is to use experts who know exactly how to maintain them. Contact your favorite cleaning company today. After all, it pays to call a pro!

Picture


Art- MZ – Cleaning – November 2020

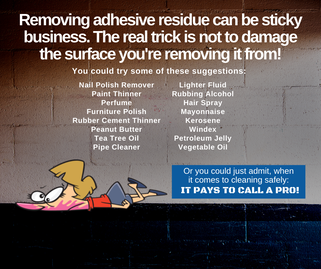
How to Remove Adhesive Residues

When something is stuck — and you don’t want it to be stuck — that can be a problem.

This is especially true when it comes to tape, glue, and other sticky stuff we use all the time in our homes and businesses. You can use soap and water, you can scrub, you can get red in the face… but when it comes to proper adhesive residue removal, there is a better way.

Scrape it off

If the adhesive residue is on a flat, hard surface, using a straight razor blade can remove the majority of the residue. It basically slices it off the surface. But be careful you don’t scratch the surface, especially wood and natural materials. If that happens, you have permanent damage. After scraping, you will still need a little dry solvent, such as rubbing alcohol or acetone, to remove what’s remaining. A few seconds of contact time is all that is needed.

Dissolve and remove

If the adhesive residue is on a soft surface, such as carpet, furniture, or clothing, you can’t scrape it off. You need to dissolve the residue and then blot or rinse it away. This isn’t easy. If you apply too much dry solvent (rubbing alcohol, acetone, etc) you can delaminate the fabric if it has a backing. You can also dissolve glues that are part of the fabric. It’s best to add a small amount of dry solvent to a white, cotton cloth that you can dispose of, and blot at the residue. Several applications will be necessary, depending on the type of residue.

The challenge is the adhesive residue does not dissolve in anything but a dry solvent. Yes, you can use high heat and hopefully soften the residue for removal, but that is problematic at best.

One big issue is when tape is used on carpet. Even if you remove the tape and clean the residue, over time, that sticky residue remaining will collect soils, such as from foot traffic. A dark line will form. Repeated cleanings will help, but this is an often-frustrating task.

The real solution is to get some advice from your favorite cleaning company. Carpet and furniture cleaning companies deal with adhesive residues every day and know what to do. Let them handle this for you.

After all, it pays to call a pro!
Picture


Art- MZ – Cleaning – October 2020

How to Find the Very Best Cleaning Company

Most of us are very busy people and must prioritize our activities. One necessary activity is cleaning our homes. Sometimes, we rush through it and don’t do the best job possible.

Life happens… but a lack of time doesn’t mean you have to put up with dirt, grime, and clutter. The best solution is to find a cleaning company to handle challenging cleaning issues you face, such as carpet cleaning, furniture cleaning, hard floor care, and more. Professional cleaners understand the proper procedures for disinfecting, as well.

When looking for a professional cleaning company, whether for regular housecleaning services or specialized cleaning, such as carpet or furniture care, there are a few specific strategies you should implement.

Referrals
One of the best ways to find any company to do anything for you is by referrals, such as from family or friends. This process automatically filters prospective companies for you, as referrals are provided to you by those you trust and have similar interests.

After all, when you enjoy a nice meal at a good restaurant or have a great experience with a service company, what is your natural inclination? You want your friends and family to have the same, great experience. So you tell them about it, and they trust that what you are sharing with them is true.

Ask around. Inquire of your family and friends in your local area who they use for cleaning services and ask for their honest opinions. The information will be invaluable.

Reviews
Second to referrals are reviews, usually online reviews such as with Google or Yelp. This is a proven way to filter out the good from the bad and find companies that usually treat their customers the way you want to be treated.

Be sure to use companies that have several reviews, over a long period of time. A long track record is best.

Interview them
Don’t be afraid to get a prospective company on the telephone or have them out to your home and ask questions, such as with any unique guarantees they might offer. Don’t look for the cheapest deal. Look for quality. Discuss with the company owner or manager what they can do for you. Let them know you are seeking out a quality company.

All of this takes time, but the end result is you will find the very best cleaning company for your home. After all, it pays to call a pro!


Picture


Art-MarketingZoo Cleaning article – September 2020

The Often-Forgotten Vacuum Bag

Vacuum cleaners are an integral part of life for any family and a common tool used daily in commercial buildings.

While the vacuum hums along doing its job, picking up dirt, grit, debris, and potential contaminants, there is a part of the vacuum we might not think about that often.

You usually can’t see it… but it’s right there, inside your vacuum cleaner — the bag.

The vacuum bag is the repositor of all substances that the vacuum collects through the beater bar or suction assembly and hoses. Unless you use a bagless vacuum, and there are some on the market today, all air goes from the surface being vacuumed and through the vacuum bag. The air you breathe around a vacuum is partly the air that has passed through the unit.

Problem detected

You know you have a problem when you turn on the vacuum cleaner and notice a foul odor. What you are detecting is the result of organic and inorganic matter inside the vacuum bag that has had time grow microorganisms that create odors. A vacuum bag that has sat a long period of time without being changed or cleaned can produce significant bad odors.

While your vacuum cleaner manufacturer will have recommendations on the frequency of changing the bag, those are simply general recommendations. Professional carpet cleaners recommend changing a bag when one-half to two-thirds full.

Is that enough?

The nose knows

In addition to following a schedule, use some common sense. Remember that a vacuum bag in the dark that is stuffed with organic soils will quickly become an odor-causing source. If you vacuum every day, you may not notice it. But give it a week or two, and the odors become evident.

At the first hint of an odor, change the bag. Even if you vacuum once or twice, and put the vacuum away for several days, it may be good to change the bag before using it again.

Bags are cheap. Your health is not.

Professionals cleaners often change the vacuum bag and clean all equipment before going from one home to the next. The do this to avoid cross-contamination. Their basic principles of equipment maintenance keep you and your family safe.

When it comes to the absolute best cleaning of all surfaces, do the right thing. Call your favorite cleaning company. After all, it pays to call a pro!


Picture

Art-MarketingZoo Cleaning article – August 2020

Cleaning Supplies Everyone Needs

Cleaning is an important part of our lives. It’s in our DNA to keep things as clean as possible, although some of us might be accused of allowing a bit of clutter at times.

What makes life easier is when we have the best cleaning and equipment supplies for the task at hand. You not only want to do the best cleaning you can but also keep productivity high and save time.

Cleaning high touch points

Especially during the COVID-19 pandemic, the topic of cleaning and disinfecting high touch points was at the forefront. To do this, you need appropriate cleaning solutions partnered with an EPA-approved disinfectant, the ability to deliver the products to the surface, and a way to wipe or clean the surface. Purchase your products in spray bottles or put your products into quality spray bottles, but as always, follow directions from the manufacturer. If you transfer products, be sure to properly label everything so there is no confusing what is being used. Store all products out of the reach of children.

Quality cloths, such as from cotton or polyester microfibers, help pick up and remove soils and contaminants from high touch points.

Maintaining the floors

Make sure you have quality brooms and mops for cleaning your floors, along with a floor cleaning solution. The bristles of your brooms should be small in diameter and packed tightly, so debris doesn’t get left behind as you work. Flat mops can be used for sweeping as well; you have plenty of options. Investigate how modern mop heads have improved over traditional string mops. Purchase quality products, and yes… you will pay more, but it will be worth it.

Your vacuum cleaner should be high quality as well, with HEPA filtration abilities. Empty your vacuum after each use if you use a bagless cleaning unit or change your vacuum bag when ? full or less. Change it if you ever notice a bad odor coming from the vacuum.

Odds and ends

A wide array of brushes, scrub pads, cleaning cloths, and cleaning solutions for all surfaces are what smart cleaning enthusiasts have at the ready. A spotting kit for your carpet and upholstery will come in handy.

Of course, the best thing is to call your favorite cleaning company to do it for you. After all, it pays to call a pro!
Picture

Art-MZ article – Cleaning – July 2020

How to Remove Nail Polish

The job of nail polish is to go onto the appropriate surface (fingernails, toenails) and stick.

The problem is when nail polish gets onto unintended surfaces, especially on carpet, upholstery, or clothing. It can be nearly impossible to remove. Aggressive efforts on your part, rubbing or scrubbing, and using harsh chemicals can damage the surface while the nail polish still lingers.

Removing nail polish, while one of the toughest cleaning chores, can be made easier with these tips. Let’s assume the nail polish has dried, since very fresh nail polish is fairly easy to remove with a typical nail polish removal product and white disposable towels.

The right stuff

Obviously, nail polish remover is the best choice for a cleaning solution.

Using a non-acetone solvent product is safer for some fibers and less aggressive, but your results may be limited. Using an acetone-based fingernail polish remover will have more noticeable effect, but also will dry out your fingertips. This type of product will evaporate very quickly, so when using it realize the contact time must be limited.

You can also use other solvents to remove nail polish, and most professional cleaning companies have an arsenal at their disposal. You may be limited to what you can get at the grocery store. That being said, pure acetone is usually the best solvent choice for the impact it has on dried nail polish.

When applying your solvent, put it on a disposable white paper towel or cotton towel, and dab at the nail polish. You should see transfer to the towel. Keep at it, but don’t rub or scrub, and don’t spread the stain.

Do your research on the type of surface you are working on. Acetone will dissolve some fibers. It will also remove paint, furniture finish, and many other finishes.

Remaining color

After you have removed as much of the nail polish as possible, you will probably notice some remaining color. This is where you have to be careful about your next product. Using some regular household hydrogen peroxide is safe on most surfaces, but there are no guarantees. After all, if it removes color from nail polish, it can remove other colors as well.

But it is a last resort way to continue to work on the stain after other attempts.

The best choice

Your favorite cleaning company has removed many tough stains just like nail polish. If you want the very best results, do the right thing. Give them a call. After all, it pays to call a pro!

Picture

Art-MarketingZoo article – Cleaning – June 2020

Wax Your Way to a Beautiful Floor


No matter how beautiful a surface in our home might be, the natural tendency is to improve it, especially when it comes to hard floors.

Hard flooring can be manufactured from many types of materials, from expensive natural stone to hard wood to synthetic blends, and more. You choose them based on your own tastes, your preferences, and no doubt by doing some research in what is best for your home.

One natural chore you may consider is actually an old term. You may want to “wax” your floor. Many years ago, natural wax was used, and it still may be used in some applications today. But the vast majority of products you would use to apply to and protect flooring is actually a synthetic floor “finish.” But for the information here, we’ll use the old term, “wax.”

Think before you wax

Not all flooring types need or require waxing. Some can even become damaged if you wax them, because of incompatibilities of substances. So do your research. Make sure that the flooring type you have installed in your home requires or can benefit from a coat of wax.

Tips for successful waxing

Before doing any type of waxing, it’s important to clean your floor completely and remove any old wax as well. A floor stripping product is required, follow directions completely, wear appropriate personal protective equipment (which may include gloves, face mask, etc), and be thorough in the process. Rinse all residues and dry the floor.

With your new floor wax product in hand, review the directions. Make sure you know all the steps to take because when you begin the process, it’s not easy to stop.

Use a new wax applicator or a new mop, applying the wax as directed, and work slowly and carefully to get an even application, spreading the product with your applicator or mop. Keep it manageable by working in sections and be careful not to work yourself into a corner. Allow the product to dry completely and apply second and third coats if the directions indicate additional applications.

Let a pro do it

As with many home projects, consulting a cleaning professional is a smart idea. And why not just let them do the job? You may avoid frustrating issues if you do. After all, it pays to call a pro!

Picture

Art-MZ Cleaning article – May 2020

The Smelly Mattress

Mattress cleaning, due simply to the bulk of what needs cleaned, is not an easy task. Yet it is one that must be done occasionally. There is nothing worse than putting your sleepy head into the mattress and be woken up.

Besides the typical use of a mattress, which to everyone who loves to sleep is very important, you still want to keep things healthy.

There are all types of issues with mattresses, from pet accidents, food and drink spills, dust mites, and more. 

So here is what you want to do.

Strip the bed

It makes sense to strip the bed of linens and blankets. If you have a mattress pad, even better. Do this on a weekly basis, at minimum. Keeping a mattress pad on at all times is smart.

You must also consider the bulk of the material and do your cleaning accordingly. Sad to say, this may not be possible to do yourself, without much effort. One thing you can do is take the mattress outside and, on a nice day, allow the air to help refresh your mattress.

Use peroxide

A natural disinfectant that not only make things healthier but that removes stains, peroxide is a great solution. It adds oxygen to the surface and removes not only stains but also odors.

Baking soda

Some say and claim that baking soda is a solution. The benefit of baking soda is it absorbs odors, much like what you experience with putting an open box of baking soda in your refrigerator.

Enzymes

Enzymes are great options that can help with stubborn stains, such as blood, urine, and more. They attack substances and remove not only spots and stains but also odors. 

When in doubt, do the right thing. Call your professional cleaning company. After all, it pays to call a pro!
Picture
Possible related image for posting.

​Art-MarketingZoo article – CLEANING – April 2020
 
The Battle Against Refrigerator Odors
 
It’s no surprise when you notice a nasty odor from your garbage can, especially when it’s full.
 
But it might be a surprise when you get a whiff of a nasty smell emanating from your refrigerator, which should normally be a haven of delicious foods and enticing aromas.
 
Your refrigerator naturally fights off offending odors because of the cold temperature, which limits bacteria growth. Most bacteria growth is pretty slow and not as offensive as others. But depending on the source (meat, milk, proteins are quick to become offensive), the resulting odors can be powerful and require immediate action.
 
Simple and easy
 
A complete cleaning of the fridge with hot detergent and water naturally removes some odors. Get into those crevices where liquids from food might have invaded. You might have to wet those areas with hot water and detergent and let it dwell for several minutes. Many nasty odors can come from small amounts of contaminants.
 
For lingering odors, leaving a container, small cup or bowl, of white vinegar in the fridge will continue to neutralize bad odors. For this to continue to work replenish the vinegar every few days. Eventually, you can stop using the vinegar treatment. Some recommend wiping down all surfaces with vinegar as well.
 
And, of course, there is the proven method of leaving a box of baking soda open in the fridge, which absorbs odors. It does this due to the ability of sodium bicarbonate to attract odor causing molecules and holding onto them. Stirring the baking soda around occasionally or replacing the box is necessary.
 
Tough situations
 
You must also realize is that removing odors from a fridge in use is much different from one that has been sitting unused for a period of time. If odors are severe, such as from an unused refrigerator being put back in action, you might have to resort to ozone generation. You can buy or sometimes rent the equipment. Using them is simple. Put them inside the fridge, keep the door shut as much as possible, and let it run for the recommended period of time for that generator. The odor will most likely be magically gone!
 
Of course, the best thing to do for all your cleaning needs is call your favorite cleaning company. After all, it pays to call a pro!
 
Picture

Art-MZ article – Cleaning – March 2020

Removing Hard Water Stains

Unsightly hard water stains can affect many surfaces and can be a challenge to remove.

Hard water stains are based on the mineral content of the water in a building or home. It all comes from the ground, so if mineral content is high in ground water, then mineral content in the water you use is going to be high.

Water softeners will solve this issue, but without a water softener system, you will occasionally deal with hard water stains and the challenges inherent with removing them.

Typical spot removers or household cleaners will not affect hard water stains, because they are mineral based. Here are some tips to remove them safely and enjoy a household free of hard water stains.

Identify

You will see hard water stains on sinks, around faucets, and even on textiles that are affected by a plain water spill. They are usually white but can be colored stains as well. If the stain is significant, you can even feel the texture of the stain. This means a bit more work may be involved removing the stain.

Remove

If the surface allows it (make sure you don’t scratch a hard surface and damage it) try scraping away the bulk of the hard water stain, if it has built up enough for you to do this.

For a cleaning agent, start safe and use plain white vinegar. Apply the vinegar to the surface and allow several minutes dwell time, remembering that vinegar can temporarily adversely affect copper surfaces. Scrub carefully and see if the vinegar is reacting with the hard water stain. This may remove most hard water stains.

If that doesn’t work, obtain a stronger acid, such as from your hardware store, that is for cleaning purposes. Wear safety gloves applicable for strong acid cleaners. Apply carefully and this should remove the hard water stain.

You can keep increasing the strength of the acid cleaner until the stain is removed, but always be careful with skin contact and vapors. Follow manufacturer directions.

Neutralize

As with any strong cleaning agent, neutralize after cleaning. This can be with a water rinse and drying with a towel. Very strong acid cleaners should be neutralized with a product for that specific purpose.

But when cleaning challenges are beyond your abilities, do the right thing. Call a professional cleaning company. After all, it pays to call a pro!
Picture
Possible related image for posting.

Art-MarketingZoo-Cleaning-February 2020
 
Stinky Garbage Disposals
 
Your garbage disposal is probably one of the devices in your home you seldom think about. After all, it’s hidden from view, you activate it with a simple flip of a switch, and it does its job.
 
But if it ever fails you, it quickly jumps to the top of the list of things you value most.
 
Your garbage disposal is, obviously, fitted to the drainpipe of your kitchen sink, and it grinds up all kinds of food waste, gunk, and more. It works diligently to gobble up and push into the sewer system what you should put and what you should never put into a disposal, which shortens the life of the device.
 
Safety first
 
It should be obvious to most that putting your fingers into the garbage disposal is a bad idea. Even when the unit is turned off, never reach in an attempt to dislodge or remove something that is hindering the garbage disposal’s efforts.
 
And when working in the disposal unit, always unplug or turn off the power before proceeding. It’s always best to call a pro in those circumstances when a simple, quick fix is not an option.
 
Disposal tips
 
While your garbage disposal might seem like a superhero, it is not. You can put many food and other items down through the disposal, but some will create future problems. And the following advice will be tempered or adjusted by the type of garbage disposal you have. Some find their disposal will dispose of anything. Others find they have to be very selective on what they put into the disposal.
 
Smaller portions are better. Avoid greasy foods, fruit pits/seeds, bones, pastas and rice, nuts, coffee grounds, and any other substances that might build up in your sewer system.
 
Maintenance
 
Taking care of the health of your garbage disposal is important.
 
Weekly — and no less than monthly — let your disposal while running gobble up some baking soda and vinegar. You can put both down the drain slowly and if you see foam develop, that’s fine, it’s normal.
 
Alternate disposing of ice and also hot water. This helps with removal of the different types of debris that may attach to the blades of the garbage disposer.
 
There are times when advice is just not enough. Do the right thing. Call your professional cleaning company.
 
After all, it pays to call a pro!
​
Picture
Possible related image for posting.

Art-MarketingZoo article – January 2020 – Cleaning
 
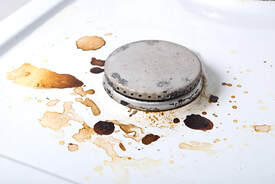
Cleaning Grease
 
Your appliances all play a vital role in the household, and especially more so during winter and the holiday season. With family, friends, and others close to you all gathering together and enjoying both festivities and home-cooked meals, your appliances can take a beating that requires regular attention and the occasional dreaded “deep cleaning” chore.
 
From the toaster to the coffee pot to the stovetop and deep inside the oven, you may have noticed grease build-up that a simple wiping off doesn’t handle efficiently.
 
Add to all of this the fact that hot cooking grease at certain temperatures becomes airborne and lands on all surfaces in the kitchen. The amount of greasy soils that can accumulate can be tenacious if you don’t stay in front of it.
 
So — what’s your game plan?
 
Cleaning products
 
What your need is a degreasing product, something that breaks down congealed grease on the surfaces of appliances, countertops, everywhere.
 
While you can purchase products from your favorite store, you can also make your own. If you take ¼ cup of dish detergent, add in 1-2 ounces of ammonia, and mix it all with 16 ounces of hot water, and for a bonus add a scoop of baking soda, you have an excellent tool to fight grease.
 
Application
 
Now it is time to go to work. Get your cleaning solution ready and start scrubbing. Let the product do the work. If needed, wet out the areas of concern and allow the solution to do its job. Keep wiping, keep soaking up the grease, don’t spare those paper towels!
 
A better idea
 
While everyone wants to do is simply buy a miracle ingredient from their grocery store and just get the job done. While that might work, it’s not always the best option. It takes much more to keep your home grease and soil free and healthier for your family.
 
Do the right thing
 
When in doubt, think about the experts you can use. Let them handle your toughest cleaning challenges, especially those that involve grease, appliances, and what you care about most – your home! After all, it pays to call a pro!
Picture
CONTACT US
Questions, Ideas, Comments or Suggestions? Tell us!

Picture
Jeff Cross: Editorial Director of ISSA MEDIA and creator of Totally Booked University. Nationally recognized cleaning and restoration trainer. Scuba diver extraordinaire.
(740) 973-4236

Picture
Gary Arndts: Award winning copywriter. Cleaning and restoration SEO expert, DIY website trainer, author and creator of the Internet marketing service firm, BlueRaptor.
(765) 935-1127


TERMS OF SERVICE: Subscribers of MarketingZoo.com agree not to distribute contents of this site to other firms for their commercial use. Suppliers, (such as website designers) may use contents of this website for your Internet marketing, but that does not extend to other clients they may have. Violation of this Intellectual Property will result in cancellation of service and legal remedies.

  • HOME
  • Take a Peek
  • SIGN UP NOW
  • MEMBERS CLUBHOUSE VISITORS
  • Help
  • OUTPOST SITE SIGNUP
  • FAQ
  • MARKETING STRATEGIES
    • Marketing Plan Recommendations
    • INSTRUCTIONS
    • SEO & WEBSITES
    • Duplicate Content Boogey Man
    • adding intros and outros
    • Youtube optimization
    • stress reduction secret
    • Videos for SEO
    • POPULAR KEYWORDS
    • cleaning and restoration marketing content and resources
  • How to Update Your Payment Information
  • CONTACT FORM
  • Vote for the Clean Party
  • BLOG
  • FREE TO INDUSTRY
  • Success
  • Canceled
  • Lesa StPierre
  • YOUTUBE
  • xmas video
  • videoblog
  • NEW SIGNUP PAGE
  • BASIC MEMBERSHIP
  • SINGLE PLUS MEMBERSHIP
  • DOUBLE PLUS MEMBERSHIP
  • TRIPLE PLUS MEMBERSHIP
  • GET STARTED
  • signup now
  • SEOptimized Videos
  • Paid YouTube Ads
  • Marketing Tips
    • Marketing Tips MAY 2022
    • Marketing Tips June 2022
    • Marketing Plan
    • Marketing Tip November 2022
    • Marketing Tip Add Subtitles to Videos